Hi all! I'm Courtney from Scraps and Scribbles. I'm thrilled to be blog swapping with Jill today. I just love her blog! Isn't she just great?!
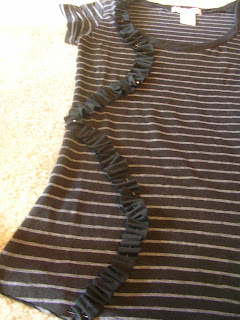
Let me briefly introduce myself: I'm a stay-at-home mom of one awesome little 18-month-old boy. I've been happily married to my hunk of a husband for just over 4 1/2 years and he is wonderful! In between chasing after my son, playing cars, cleaning up Cheerios, folding laundry and spending time with the hubs, I like to craft, sew, cook and take pictures. I'm a make-up and fashion nut. I started my blog to share the things that I love with everyone and I've made some great friends in the process. Here are some of the projects I've done that you can find over at Scraps and Scribbles:


This past spring, I decided to take my love of crafting to the next level and started an Etsy shop, D Squared Creations and Boutique, that I run with my super sister-in-law. We sell hand-made goodies such as

Rag Bracelets

Earrings

and Tile Pendant Necklaces (you can find the tutorial for them here) as well as cool vintage items. You can check it out here.
Enough of that! On to the good stuff. I'm super-excited to share my tutorial with you. I don't know if you have the same problem I do with your earrings, but I can't seem to find an organization system that works. First, there was this:
Then I moved on to this:

It worked for a little bit but my earrings kept falling off. So I started thinking, what else could work? I needed something that would work for my bigger earrings and my hoops, which the french memo board didn't accommodate. Here's what I came up with:
Picture Frame Earring Organizer
To make yours, you'll need:
A picture frame
Paint and brush
Ribbon
Hot glue gun
Sandpaper

I got this frame at the Goodwill outlet for like 50 cents!
Took it apart
And painted it a lovely shade of peacock teal.

Once the teal was dry, I spray painted the whole thing black.
When the black paint had dried, I lightly sandpapered the frame so that the teal would peak through.
Like so.

Taking the ribbon, cut 9 pieces the same length as the width of your frame.

Loosely braid three pieces together.
Then hot glue the three braided pieces onto the back of the frame. Space them however you'd like. Some of my spaces were bigger for my longer earrings.

And volia!! A customizable organizer for your lovelies. And on the cheap!
Thanks so much for having me visit today, Jill! I had a great time!
I hope you all come by and visit me over at Scraps and Scribbles!
Thanks for the great post Courtney! I hope you all will stop by and visit her. She has a great blog and is so sweet. She's become a good blogging buddy of mine :)
Also, I did a guest tutorial over there for this cute little no-sew tutu:


cute idea!!!
ReplyDeleteGreat projects, love that ruffled Tee!! I can see making one of those for my darling daughter! TFS
ReplyDelete