Today's tutorial is courtesy of the sweet and talanted Marilyn from The Artsy Girl Connection. Marilyn has lots of great tutorials, including everything you need to throw a fairyland theme birthday party {love it!} She's a great bloggy friend, so go visit her and introduce yourself!
~*Fairyland Birthday Wishing Tree*~
If you keep on believing, the dreams
that you wish will always come true.
Hello friends & blog budddies of Jill's, I am Marilyn
from "The ArtsyGirl Connection & am VERY honored
to be featured on Women Who Do It All today (squeaaals)! Hope
you enjoy my artsy creation/tutorial today & it
inspires you all to come visit me at
It's truly one of my favority artsy creations yet!!
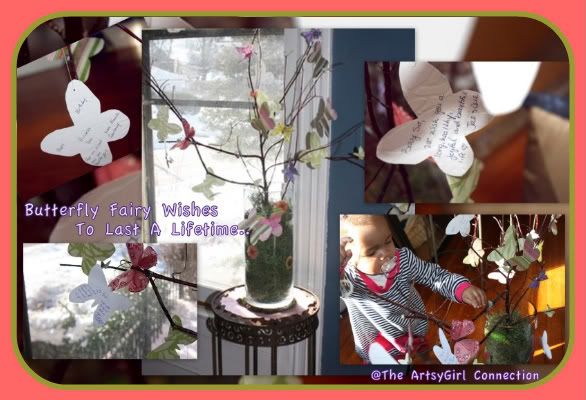
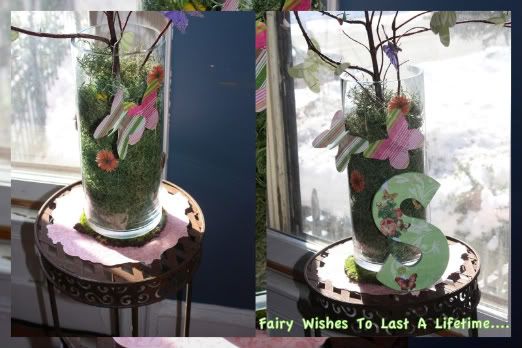
My tutorial today features a Fairyland Birthday Wish Tree
from my daughter's 1st birthday party this month. I can't believe
she's already 1-- it's been a very emotional month, from
watching her learn to walk, actually running now, flushing
the toilet & insanely driving everyone crazy during shower time
(she sneaks in and turns the cold water nob full on! brrrr)!
This wish tree works perfectly in so many ways as the wishes
last a lifetime!! You can substitute recieving birthday cards
(which most ppl throw away) and simply have ppl write your lil
one a wish instead. You can save the wish tree forever,
add to it during special occasions and always reuse for
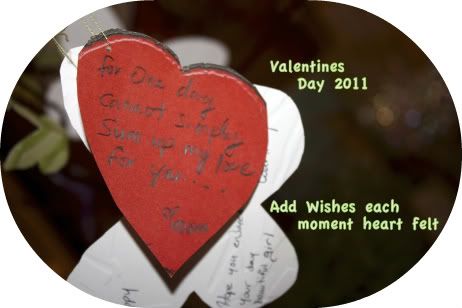
different events..We just added valentine wishes the other
day with cute love notes to the tree.
Ready To Build Your's???Here's what to do ;))
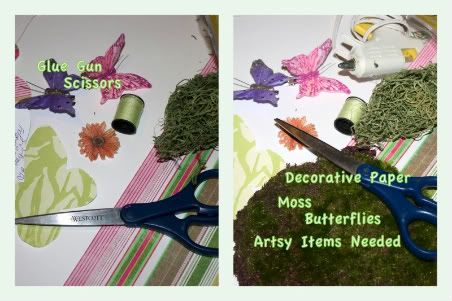
~Artsy Items Needed~
*Plain Tall Vase
*Loose moss (Michael's Purchase)
*Dried Tree Branch (Preferably one with lots of branches
I cut this branch from a bush in front of my house that
I loved simply because of the red tone it had; depending on the
branch color you prefer, you can spray paint the branch to flow
with your party theme or color)Look around your neighborhood
and snag a small branch fitting for your needs! Priceless!
*Wild Flower Stickers (The lil flower's on the wish tree vase)
*Butterfly Clips(Various Colors)
*Clear Strings or ribbons if you'd like
*Hole Punch (preferrably a smaller one;
u can get creative and use shaped punchers)
*Stencils ~a variety of sizes(I used butterfly and dragonfly stencils to match
my theme,but you can use whatever stencil's you'd like per your party.
Simply print out stencils online and cut them
carefully for free) Smaller ones to simply hang on tree and
and bigger ones for the written wishes to go on.
*Assorted decorative paper of your choice (I used both one
sided designer paper<-I used these for the written wishes; &
two toned designer paper<-to cut out the stencils
for hanging butterflies for the tree. The two toned looks pretty & works well
as you can see the patterns on both sides as they hang)
*A flat moss rounded placement patch to set your vase on
*Scissors
*Glue Gun
(Everything Listed Above Can
be bought at Michaels Craft Store)
Ready To Craft...? ;))
To begin, Simply fill the vase with green moss(you
can use whatever moss color of your choice depending on the
look you'd like), press down for a firm foundation and loosen up as
you get closer to the top of the vase to give the
moss a fun bushy & looser look
Insert tree branch into the vase and support to stand
straight (you can hide all sorts of objects within the moss for
support, I chose not to use glue for hold in order to be able to
reuse the moss whenever I needed or move it around in the vase)
Once tree is standing firm, place it on your table on top of the
moss placement, add the wild flower sticker's to the outside
of the vase all around sparingly --That's half the
process---"The FUN Begins"
Cut out your butterfly stencils(as many as needed for writting the
wishes and stack them in a pile), String them at the tip of each
towards the top corner of the butterfly wing so they can be hung
up by your guests after writing out their wishes.
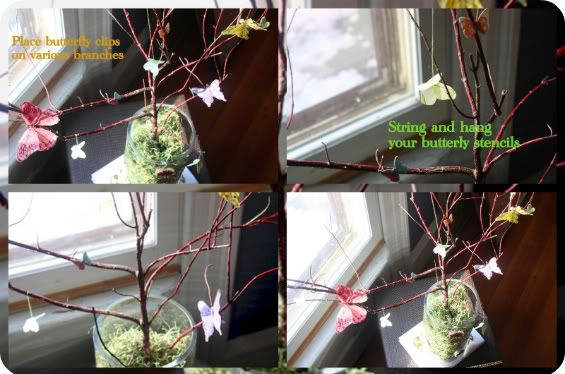
Cut out the smaller butterflies and fold them down the middle
before you string them. String some in the middle and some to the
edge of the wings. This allows it to look a bit 3D and
you can see all sides as they hang. Hang them on different branches
of the tree. Glue the smaller ones on the branches
in different spots. Add the butterfly clips to the tree as
well at different angles for a nice and pretty artsy look.
Once that's all done, place
the pile of blank butterfly wishes to be written
in a nice pile by the wish tree stand or table,
and place a few pretty pens next to them.
You are ALL DONE!!!
As your guests arrive, have them stop by the wish table and
write out lil wishes to last a lifetime to the beautiful birthday
princess...These where SUCH a HUGE hit at Sia's
birthday party!! We had some very cute and FUNNY
wishes all around & everyone LOVED IT!!
Hope this tutorial helps add a beautiful
addition to your fairy birthday or event!!
Faith, trust, pixie dust & a tree full of wishes to last a fairy lifetime!!
With love and fun wishes~
.....Marilyn


 -Balloons (I used 320 7" balloons- they come in packs of 40 balloons for 97 cents at Wal-Mart)
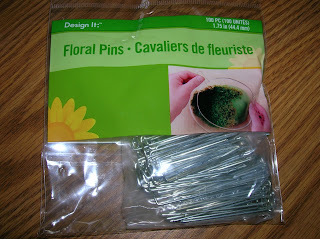 -Floral Pins (I also got them at Wal-Mart. A pack of 100 is $1.00)
 -A straw wreath (I purchased an 18" wreath at Michael's for $4.99. Use a 40% off coupon to get it for super cheap!!). Keep the plastic wrap on it.
 Now comes the fun part . . . take a floral pin and slide it over the middle of the balloon. Poke it into the wreath so that it is nice and tight . . . and repeat . . . and repeat . . . and repeat . . .
 If you happen to have your sisters in town (like I do!! Yey for sister time!!), put them to work!! :)
 Just keep poking those balloons in until the entire wreath is full.
 And there you go! Ready to put on the door for the next birthday! I am always looking for ways to make birthdays more special and I think that this will make my kids even more excited for when their birthday rolls around. It is a super fun and super easy birthday tradition.
 -Balloons (I used 320 7" balloons- they come in packs of 40 balloons for 97 cents at Wal-Mart)
 -Floral Pins (I also got them at Wal-Mart. A pack of 100 is $1.00)
 -A straw wreath (I purchased an 18" wreath at Michael's for $4.99. Use a 40% off coupon to get it for super cheap!!). Keep the plastic wrap on it.
 Now comes the fun part . . . take a floral pin and slide it over the middle of the balloon. Poke it into the wreath so that it is nice and tight . . . and repeat . . . and repeat . . . and repeat . . .
 If you happen to have your sisters in town (like I do!! Yey for sister time!!), put them to work!! :)
 Just keep poking those balloons in until the entire wreath is full.
 And there you go! Ready to put on the door for the next birthday! I am always looking for ways to make birthdays more special and I think that this will make my kids even more excited for when their birthday rolls around. It is a super fun and super easy birthday tradition.